Utilising Craft CMS’s Element Types for Custom Development


In the dynamic world of web development, Craft CMS has emerged as a game-changer, offering unparalleled flexibility and custom development capabilities. One of its most powerful features is the concept of Element Types, which underpin Craft's content modeling prowess. As a seasoned developer, I've seen firsthand how understanding and utilising these Element Types can transform the way we interact with content, making it more adaptable and user-friendly. This article will delve into the intricacies of Element Types in Craft CMS, from their definition to their practical application in database management, localization, and even editing and saving elements. Whether you're a seasoned developer or a curious beginner, this exploration of Craft CMS's Element Types will provide valuable insights into the potential of custom development.
Element Types in Craft CMS are the fundamental building blocks of content. They are defined by classes that implement craft\base\ElementInterface and use craft\base\ElementTrait. Each Element Type represents a unique type of content, providing smart management, routing, and querying interfaces for users and developers. This concept is integral to Craft's content modeling features, allowing for a flexible and adaptable approach to content creation and management. Understanding Element Types is key to unlocking the full potential of Craft CMS.
Craft CMS comes with seven built-in Element Types:
Each of these Element Types serves a specific purpose and contributes to the overall functionality of Craft CMS. For instance, the craft\elements\Asset Element Type is used for managing media files, while the craft\elements\Entry Element Type is used for managing individual entries in sections. By understanding the different types of Element Types available in Craft CMS, developers can better leverage the system's capabilities to create more robust and flexible content models.
Defining Element Types in Craft CMS involves the use of specific classes that implement craft\base\ElementInterface and use craft\base\ElementTrait. These classes serve as a communication medium about your element type through static methods and as a model that elements of its type will be instantiated with. This process is crucial in the creation of Element Types, as it sets the foundation for the type of content that the Element Type will represent and how it will function within the Craft CMS environment. The craft\base\ElementInterface and craft\base\ElementTrait are the key components in this process, providing the necessary structure and functionality for defining Element Types.
Working with Element Types in Craft CMS is a straightforward process that involves three main steps: creating the element query, setting parameters, and executing the query. This process is applicable to all Element Types, making it a universal method of interacting with content in Craft CMS. Each Element Type provides smart management, routing, and querying interfaces, making it easy for both users and developers to work with them. Whether you're managing assets, categories, entries, or users, understanding how to work with Element Types is essential for effective Craft CMS development.

We love Craft CMS at MadeByShape
One of the powerful features of Craft CMS is the ability of custom elements to store additional attributes in a predictable way. This is achieved without depending on custom fields, providing a flexible and efficient method for managing content. When defining a custom element, you can specify public properties for any custom attributes your elements will have. These attributes are then stored in the database, allowing them to be easily accessed and manipulated as needed. This feature enhances the functionality of custom elements, making them more adaptable and useful in various content management scenarios.
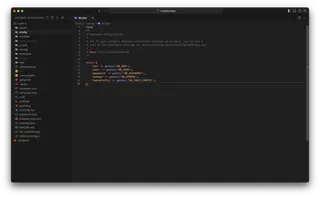
Managing the database in Craft CMS is a straightforward process, thanks to the platform's robust database connection settings. Craft supports several settings that give you control over how it connects to the database. These settings can be configured from a config/db.php file, allowing for a high degree of customization. Craft can connect to both MySQL and Postgres databases, providing flexibility in terms of the database systems you can use. Additionally, Craft CMS offers various ways to back up a database, from its control panel utility or console command to GUI apps or tools provided by your web host. This makes database management in Craft CMS a seamless and efficient process.

The Element Query Class in Craft CMS plays a pivotal role in managing and fetching elements. It is an extension of query builders, specifically tuned for fetching elements. The Element Query Class has three main responsibilities. First, it provides public properties and setter methods for capturing custom criteria parameters. This allows for a high degree of customization when defining the parameters of your query. Second, it joins in the custom element table and selects the appropriate columns within it. This ensures that the correct data is being accessed and manipulated. Finally, it executes the query and returns all results as an array. This makes it easy to work with the data returned by the query, as it is presented in a structured and accessible format.
Using the Element Query Class in Craft CMS involves three steps. First, you create the element query by calling a “factory function” that corresponds to the element type you want to fetch. This sets the stage for the query and defines what type of elements it will be working with. Second, you set some parameters. By default, element queries will be configured to return all elements of the specified type. However, you can customize this by setting your own parameters, allowing you to narrow down the results based on your specific needs. Finally, you execute the query. This will run the query and return all results as an array, ready for you to use in your application. This process makes it easy to fetch and work with elements in Craft CMS, providing a flexible and efficient method for managing content.

Tom working in the studio
In Craft CMS, localization is a powerful feature that allows elements' title and custom field values to be stored on a per-site basis. This means that you can have different versions of your content for different sites, all managed within a single Craft installation. This is particularly useful when you're managing a multi-language site or a site with region-specific content.
When I talk about elements in this context, I'm referring to the various types of content that Craft CMS can handle, such as entries, assets, categories, tags, and more. Each of these elements can have their own title and custom fields, which can be localized per site.
For example, let's say you have an English site and a German site. You could have an entry with a title of "About Us" on the English site, and the same entry could have a title of "Über uns" on the German site. The same goes for any custom fields the entry might have.
Localizing elements in Craft CMS involves a few steps. First, you need to define your sites and languages. Each language you want to support will need its own site in Craft. Once you've created a new site for a language, you'll need to enable the new site in each section that you want to be available in the new site.
Next, you'll need to decide which fields should be translatable. In the settings for each field, you can choose a translation method. If you want the field to have unique values across your sites, you'll need to choose "Translate for each language". This will allow you to update the field's content in each entry on a per-language basis.
Once you've set up your sites, sections, and fields, you can start localizing your content. When you edit an entry, you'll be able to switch between your sites and enter different content for each one.
Remember, localization in Craft CMS is a powerful tool for managing multi-language or region-specific content. By understanding how to localize elements, you can make your content more accessible and relevant to different audiences.
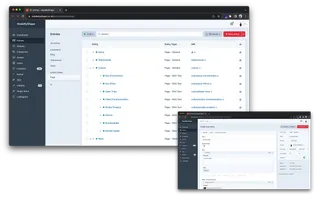
In the realm of Craft CMS, editing elements is a breeze, thanks to the turn-key edit screens and automatic support for slideouts. When I want to create a new entry, I simply navigate to the Entries section in the Craft CMS control panel. Each of the sections is listed down the side of the page. I choose the one I wish to create a new entry in, and then press 'New entry'.
I then give my new entry a Title and some content. One of the features I find most useful is the ability to see exactly what it’s going to look like once it’s live by pressing 'Preview'. This real-time feedback allows me to make adjustments on the fly and ensure the final product is exactly as I envisioned.
The process of saving an element in Craft CMS is just as straightforward. When I’m ready to publish my entry, I press 'Create entry'. My entry is then saved and published to the site. If I need to update an existing entry, I go to the Entries section and search for the entry I wish to edit. Clicking on its title opens its edit page.
As I make changes, the revision menu shows that the content has been edited, and any fields that have been modified are marked with a blue line. This helps me keep track of what’s changed. My changes are stored automatically, so if I leave the page and return to it later, I can pick up right where I left off. When I’m ready to publish my changes, I press 'Save'. If I’ve changed my mind and would like to discard my changes, I open the revision menu and press 'Discard changes'.
In the end, the ease of editing and saving elements in Craft CMS makes it a powerful tool for managing content. Whether you're making minor tweaks or major overhauls, the process is intuitive and efficient.

In the realm of content management systems, Craft CMS stands out with its flexible and powerful Element Types. From understanding their concept and types to defining and working with them, Element Types are the backbone of content modeling in Craft CMS. They offer a level of customization that allows for the creation of unique and dynamic content. The database management capabilities of Craft CMS further enhance this flexibility, allowing for the storage of additional attributes and efficient database management. The Element Query Class plays a crucial role in fetching elements, while the localization feature ensures content relevance on a per-site basis. Finally, the ease of editing and saving elements in Craft CMS makes it a user-friendly platform. In essence, mastering Element Types and their associated features in Craft CMS opens up a world of possibilities for custom development.
I'm Tom, a Web Developer at Shape - when I'm not making slick Craft CMS or Shopify websites, I'm usually feeding my sourdough starter or baking a loaf.